First Steps

Installing the App

Download the iPlayMe2 app from either the Apple App Store (iOS devices), or the Google Play Store (for Android smartphones). You’ll have to do this from one’s actual smartphone, not the computer or laptop or tablet, as iPlayMe2 will need to validate your cell phone number.

Open iPlayMe2 for the first time

After the initial welcoming screen transitions, tap the “LOGIN” on the lower left hand side. Decide to connect via your Facebook account, Google+, or regular e-mail.

If you'd like to connect via regular e-mail, you’ll need to enter your preferred e-mail address, and a unique password. iPlayMe2 will then ask you to input your mobile telephone number, which will then get validated through sending you a security code via text message (at no charge to you). Enter the security code. You’re now an official iPlayMe2-er ;-)

Get a Game

iPlayMe2’s most innovative feature is the ease of scheduling a game with friends and opponents, including, if you want, those you haven’t yet met, but who fit your playing criteria.

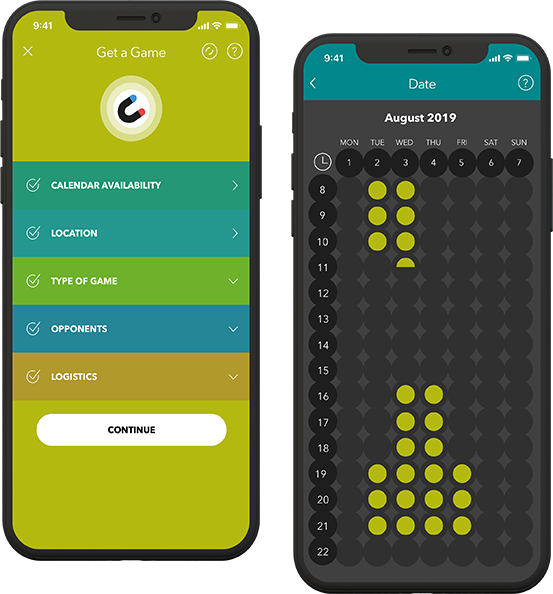
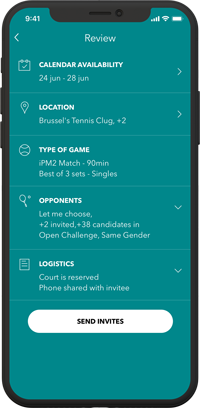
On the bottom of the Dashboard screen, there is the button “Get A Game”. Tap this once. A Get A Game screen appears, with four necessary fields to quickly fill in, as shown below.

Calendar Availability

You’ll need to tap on the day(s) and hour(s) for which you’d like to schedule a match. You can choose just one hour, or several time options.

Tapping on the vertical day column allows you to select that entire day. Tapping on any horizonal row selects that same hour acros the entire following 7 days.

Double-tapping on any one circle shifts it to just the first half-hour; another tap shifts it to the last half-hour of that hour. A fourth tap de-selects that hour entirely. After selecting when you’d like to play, tap “CONFIRM OPTIONS”.

Choose Location

Tap CHOOSE LOCATION, and type into the search bar the name of your preferred club or location within 25km of your current location. A list of clubs will appear under the tab “See Results on List”.

Tap on the circle along side the preferred club at which you’d like to play your match. Go up to the upper right hand corner of this screen to click “Done”.

Type & Category of Play

Tap “TYPE & CATEGORY OF PLAY”, to select Singles or Doubles. Then what type of game (Practice Hit, or iPlayMe2 Match, or Either). If type of Match, scroll to select what type of match (e.g. Best of 3-Sets).

Then select whether you want to invite only those opponent of the same gender as you, or either gender (mixed). Then continue to scroll the duration of the match (e.g. 60 minutes, 90 minutes, etc).

Define Your Play

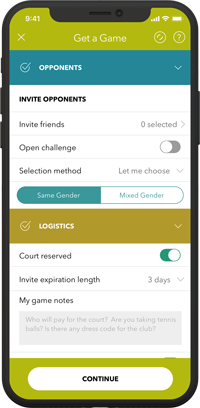
Tap “DEFINE YOUR PLAY” to select which opponents you’d invite, and how you’d select them. Tap “CHOOSE OPPONENTS”, and see a list of all your contacts currently within your smartphone contact list.

Find those you’d like to invite, and for each one, gently tap and swipe right, to “Add to Invite”. Add as many of your current contacts as you’d like. When finished go back by tapping on the back arrow in the upper left hand corner.

Logistic

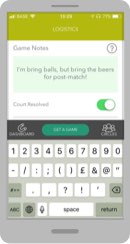
Feel free to write any notes to your potential opponents, such as “whites required, court is paid for, bring your own balls too, etc.” Let your opponents know whether the court is definitely resolved (reserved), and whether you’d share your mobile number to your opponents if case he / she / they need to call or text you before showing up for the match.

Invitation Expiration Date

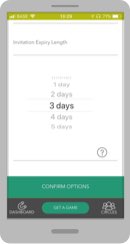
Finally, set an “Invitation Expiration Date”, where by possible opponents need to reply by. Otherwise, your invitation will evaporate at that time, as no one would have confirmed their interest to you by then.

Tap “CONFIRM OPTIONS”

Game Summery

After confirming, iPlayMe2 will show you a Game Summary, listing out all of the options you configured, so that you’re sure you haven’t made a mistake. Scroll to the bottom to SEND INVITE, whereby the actual invite will be sent to all of your invited opponents.

Dashboard

iPlayMe2 then returns you to the Dashboard, whereby you’ll see your invite within the section “SCHEDULED GAMES”. Your game invite is highlighted against a grey background, with a triangle in yellow, advising you that until now, no one has yet confirmed. Now wait until one or more of your invited opponents dedide to accept your invite.

If you selected the Game Candidate Method to be “First Come First Server”, the first opponent who accepted actually confirms the invite, converting this pending invite into a confirmed match, with the text in white, the background in black, and a green check-mark to show total confirmation.

You’re now scheduled to play on that date, at that location, and against that specific opponent. With no need to ever have texted, e-mailed, or telephoned. Super easy ! Now go play your match. Once you finish, go to the next section below, “Report A Score”.

Report a score

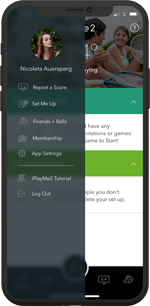
To report a match result, go to the “hamburger” menu accessible on the upper left side of the app, tapping on that 3-lines vertical icon. The first option on the list is “Report a Score”. Tap that.

You’ll then see the list of previously scheduled matches played already, waiting for you or your opponent(s) to enter the match result. Tap on one of them.

Enter the Match Result

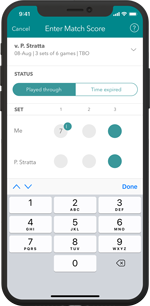
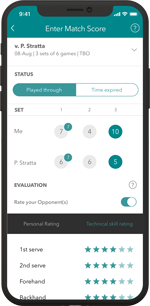
Start to enter the match result for each player, set by set.

Upon tapping one player’s score, you’ll be presented with a “selector wheel” with which to scroll to the correct number of games won for that set. Tap that number. Then tap anywhere else on the screen to save the “games-won” result. Continue with the next player, and the next set. Until you’ve inputted the score.

Either of the opponents can enter the score, but generally we expect the winner to enter the match result, assuming he / she is an iPlayMe2 player. You can enter scores for matches played against non-iPlayMe2-ers, but obviously, only that who is an iPlayMe2-er can enter the score on the app.

Adding Sets & Breakpoints

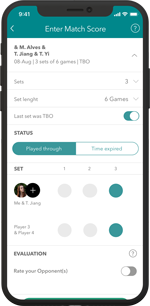
Once you’ve added the score of the first set, go to the next set by tapping the plus + to the right of “Add more sets”. For tie-breaker sets, the app will ask you to enter in the points won by each player in that tie-breaker.

When playing “10-break Championship Tie-Breaker Only” deciding set, switch the TBO to “on” by swiping right. Then enter in the TBO (tie-breaker only) points won which determine the match winner, by definition.

If the match has been played through completely, to its logical end, tap “Played Through”. If time ran out, or weather prevented a normal end, select “Time Expired”, which will let the match result be entered as is.

Rate Your Opponent

You can anonymously evaluate your opponent, or doubles team, by swiping right. Tap the quantity of stars for each criteria presented. 1 star is the weakest rating; 6 stars are a maximum rating. You can rate your opponent on a personal basis, as well as on a technical ability / quality basis. Only averages over at least five players’ evaluations are eventually shown to the opponent. Depending on your Membership level, you can view an opponent’s profile BEFORE accepting an invitation, or after, to plan your game strategy.

Once finished, tap “CONFIRM MATCH SCORE”, to enter the match’s result as final, for both players. The app transfers you to the SCORES & RANKINGS section, where you can see that match’s result, listed in reverse chronological order (most recent on top). Just scroll down to see past match results.

If a mistake has been made entering the result, swipe left on any score, to “DISPUTE SCORE”. A yellow triangle appears, indicating that iPlayMe2 will reach out to both players, to ascertain the correct result. If an agreement isn’t amicably reached, that match’s result will not count, but both players’ future activities with iPlayMe2 will be reviewed. Abusive behavior, strange results, or many disputed results may contribute to that player being dis-connected from iPlayMe2.

Circles

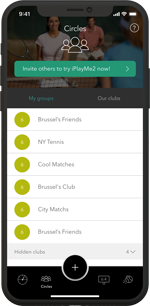
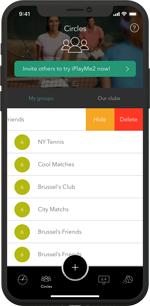
The feature “CIRCLES” is designed to help players group, or organize, their known opponents into groups, or circles, of similar ability, availability, or club location.

You can organize your circles any way you wish, naming them “Singles”, “Doubles”, “Strong”, “Mediocre”, “Club A”, etc.

Add a New Circle

To add a new circle, tap “New +” located at the upper right hand side.

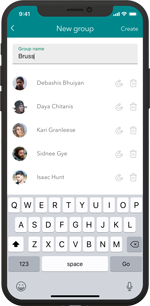
A blank circle will appear, requesting that you name it. Type whatever name is meaningful for you.

Once you’ve named that new circle, go to the “Save” on the upper right hand side

Add Players to Circle

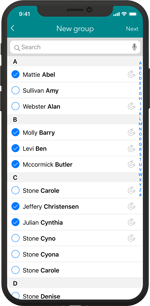
Then start locating your contacts from your smartphone, so to add each to this new circle, by tapping the “Add” in the upper right hand side of the app’s screen.

You’ll then see that circle with the number 1 within it, signifying that you have one player within that circle. Continue adding players as relevant by re-tapping that Circle’s name.

Add New Contact

For players not yet in your smartphone’s contact address book, consider tapping “Add New Contact” at the bottom of that screen. iPlayMe2 just needs to know this new contact’s first name, last name, and e-mail. The app returns you back to the current status of that circle’s contents of players. Continue as needed.

Delete Circle

To delete a circle, swipe left. Confirm “Delete”. And you’ve cleared that circle.

Return to the Dashboard when finished.

App settings

There are two important app settings to consider when setting up your iPlayMe2.

How would you like to receive notifications from iPlayMe2.

What type of hour format you prefer

Setting Time Format

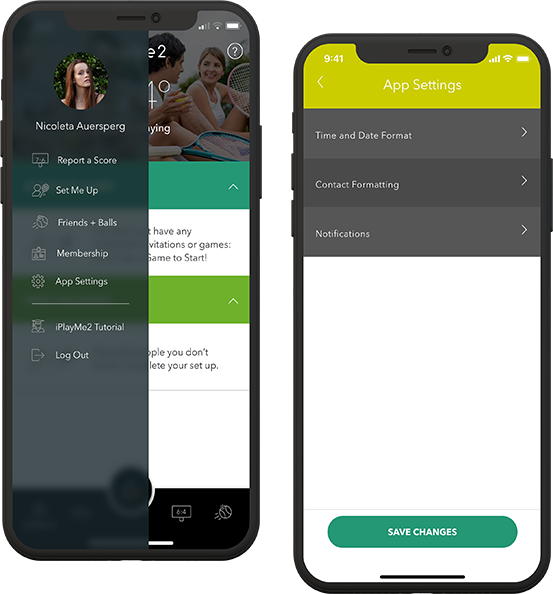
Tapping on the “Hamburger” menu on the upper left hand side of the home screen, you’ll access the “Side Menu”, within which App Settings is one of the options. Tap that.

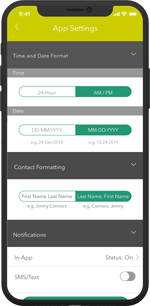
Select whether you prefer to see your calendar invites and playing dashboard using the 24:00 hour time format, or the 12-hour AM / PM time format.

Notifications

Communications-wise, you can choose whether to receive iPlayMe2 notifications via in-App, SMS / text messages, and / or also via e-mail.

Our suggestion is to receive iPlayMe2 messages from all channels, until you’ve well experienced using the app, and want to limit duplicate messages.

Friends & Balls

Earn credits, or “Balls” by inviting your tennis-playing friends and acquaintances to try iPlayMe2. For every player you invite (and who then registers), a “Ball” is awarded to you, and can be seen in your “Friends & Balls” balance. With those Balls, you can upgrade free to higher levels of membership, and enjoy greater features from iPlayMe2.

Your Balls

Tapping on the “Hamburger” menu on the upper left hand side of the home screen, you’ll access the “Side Menu”, within which Friends & Balls is one of the options. Tap that.

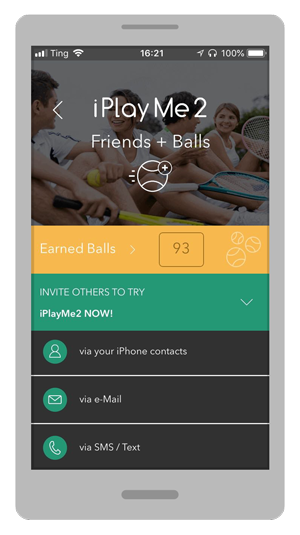
This main screen will always show you how many credits, or “Balls” you have accumulated so far, and what your balance is. You earn one (1) Ball for every invited friend who registers with iPlayMe2. Over time, we’ll be awarding Balls for matches won, doubles teams formed, and the quantity of opponents against whom you’ve competed.

Earn Balls

By tapping “Invite Others to Try iPlayMe2”, you’ll be presented with four methods with which to invite your tennis-playing friends: via your smartphone contacts, via e-mail, via SMS / text, and via social media.

Invite Individuals

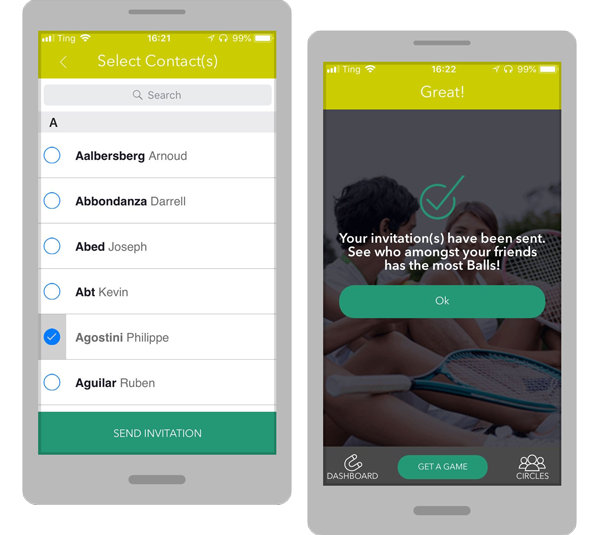
When selecting to invite individuals via those contacts found in your smartphone address book, you’ll be presented with your contacts. Find that individual you’d like to invite, and tap the empty circle by his or her name.

[Please note that for iPlayMe2 to display your contacts, those must contain a valid e-mail address, and a first and last name.] Otherwise, iPlayMe2 will not recognize the contact as valid. Users may have input friends into their address book by just using nicknames, initials, etc., not reflecting their formal names, or at least including a first name, a last name, and a valid e-mail.

Once you invite an individual, you’ll see the confirmation that your invitation was sent. If that individual already is an iPlayMe2-er, the app will suggest you invite another, different individual. Players who already use iPlayMe2 will not receive a duplicate invite from yourself.

Via E-mail or Cell Number

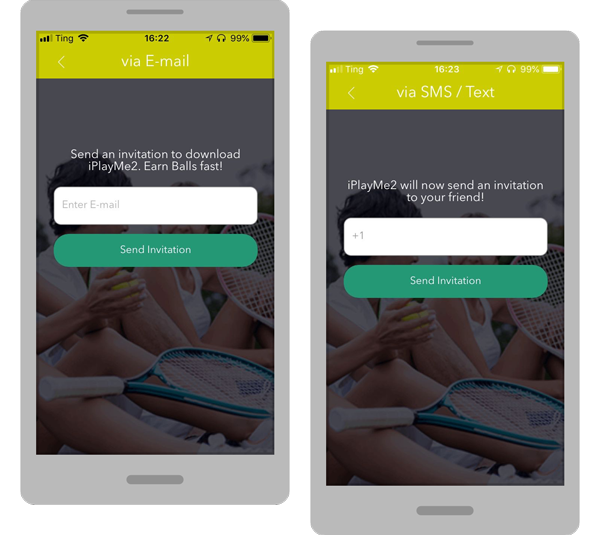
You can also insert the e-mail of an individual to invite to use iPlayMe2, assuming he or she is not already within your smartphone address book.

You can also invite an individual with just his or her cell phone number. Make sure to include the Country Code, adding a “plus” (+) sign head of that Country Code. For the United States and Canada, for example, add the “+1” ahead of the standard area code.